A new patio or raised bed transforms how a garden functions — one gives you a usable outdoor surface, the other gives you productive growing space. Both projects are achievable for a competent DIYer over a weekend or two, and both reward careful planning and the right materials from the outset. This guide covers the decisions, products, and practical steps common to each.
Planning and Layout
Before lifting a single sod, invest time in marking out the area properly. For a patio, sketch the space on paper and note any changes in level, existing drains, and the direction you need surface water to run. A patio must fall slightly away from the house — a gradient of 1 in 60 is standard practice and typically the minimum that satisfies a building inspector or mortgage surveyor.
For a raised bed, decide on the height before you buy materials. A bed at ground level requires minimal edging; one at 40–60 cm gives better drainage and is far easier to work without kneeling. Consider access on all sides: a bed wider than 1.2 m is awkward to reach across from one edge.
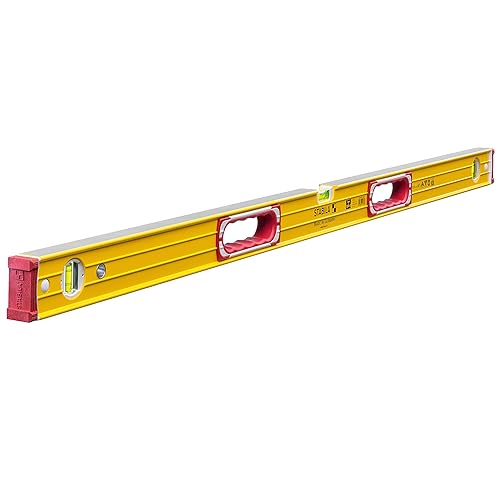
Use a Stanley FatMax 8m Tape Measure to set out your dimensions accurately, and mark corners with pegs and string lines. Checking diagonals confirms whether a rectangle is truly square — both diagonals should be identical. A Stabila 196-2 Spirit Level 120cm is worth having at both stages: it will serve you for bedding slabs and checking the tops of raised bed boards level.
Ground Preparation
Both projects start with stripping topsoil and organic material from the footprint. Topsoil compresses and shifts under a hard surface, so for a patio you need to remove it entirely and work down to stable sub-base material. For a raised bed built on compacted ground, removing the top layer and loosening the subsoil improves drainage into the ground beneath.
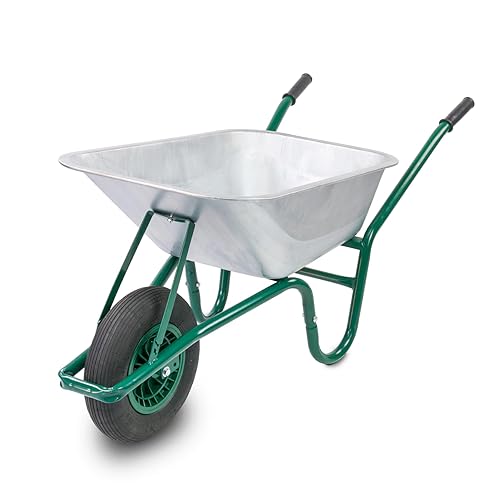
A KCT 85L Galvanised Wheelbarrow is essential for moving stripped soil and hardcore around the site. The galvanised steel tray resists rust even when carrying wet material repeatedly, and 85 litres is a practical capacity that balances load against manoeuvrability on a domestic site.
For a patio, compact hardcore or MOT Type 1 to a minimum 100mm depth, then lay and compact a sharp sand bed to around 50mm — this is the bedding layer your slabs sit in. For a raised bed on soft or waterlogged ground, consider laying a membrane liner in the base to suppress weeds while still allowing drainage.
Patio Materials and Laying
Choosing Slabs
Concrete flags are the most widely used material for domestic patios in the UK. They are consistent in thickness (important for even bedding), widely available, and far more affordable than natural stone. The Marshalls Argent Smooth Paving Slab is a well-regarded concrete flag with a structured surface finish that provides grip without sacrificing appearance. Always buy ten percent more than your calculated area to account for cuts and any damaged pieces.
Natural stone — sandstone, slate, or limestone — gives a premium look and ages well, but thickness varies across individual pieces, which makes bedding more demanding. If you are new to laying paving, start with a consistent concrete flag rather than natural stone.
Laying the Slabs
Lay slabs on five dabs of mortar (one at each corner and one in the centre) rather than a full bed, unless you have sufficient experience to achieve a consistently flat surface across a solid bed. Tap each slab to level with a rubber mallet, using your spirit level to check regularly across the length and width. Work from a fixed, straight edge and use tile spacers to keep joints consistent — typically 10–15mm for standard flags.
Point the joints with a dry mortar mix or proprietary jointing compound once the slabs have fully set. Brush it into the joints and allow it to cure before allowing foot traffic.
Raised Bed Options
Kit Beds
The simplest entry point is a prefabricated raised bed kit. The Conka Garden Raised Bed Kit assembles without specialist tools — boards slot or bolt together in a matter of minutes and can be reconfigured if you want to change the layout later. Kits suit smaller growing areas and renters who may need to move the structure.
Timber Sleepers
For a more substantial and permanent build, Treated Timber Sleepers 2400mm are hard to beat. They are heavy — which is an advantage, as it keeps them in place — and the treatment makes them suitable for ground contact. A standard raised bed can be built from two or three courses of sleepers stacked and pinned together with rebar or long structural screws.
When stacking sleepers, stagger the joints between courses like brickwork so no vertical joint runs through the full height of the bed. Pre-drill pilot holes before fixing to avoid splitting the timber, especially near the ends.
Custom Sawn Timber Frames
A more refined option uses structural planed or rough-sawn timber boards cut to length and assembled into a frame with corner posts. Use treated C16 or C24 timber for any components that will be in contact with the ground or soil. Fasten boards to corner posts with Reisser R2 Pozi Woodscrews — the Reisser R2 range cuts cleanly into treated timber and resists corrosion, which matters when exposed to continual moisture in a planted bed. For joints that need bonding before screwing, Gorilla Wood Glue provides a waterproof bond with enough open time to make adjustments before clamping.
Essential Tools
Beyond the level and tape measure already mentioned, you will need:
- A flat spade and a pointed spade for breaking and lifting ground
- A long straight edge or screed board for levelling compacted sand or hardcore
- A rubber mallet for bedding slabs without cracking them
- A brick bolster and club hammer for cutting slabs (or hire a disc cutter for clean cuts on larger areas)
- A drill/driver for timber raised bed work
Borrow or hire what you will not use regularly. The tools worth owning outright are those that get used on multiple projects — a good spirit level, a quality tape measure, and a reliable drill/driver fall into this category.
Fixings and Post Setting
Where you need to anchor corner posts for a raised bed — particularly taller structures — drive a length of rebar vertically through the stacked sleepers or into the corner post and into the ground. For lightweight gateposts, marker posts, or freestanding uprights at the corners of a timber frame, Blue Circle Postcrete 20kg is a rapid-setting dry-pour concrete that sets in around ten minutes without mixing. Place the post, pour the dry powder into the hole, and add water — it is considerably faster than batching site-mixed concrete for a handful of posts.
Finishing and Maintenance
Patio
Once the pointing has cured, apply a masonry water seal to protect the surface from winter freeze-thaw cycles and staining. Everbuild 402 Water Seal 5L is a silicone-based treatment that soaks into the surface and repels water without changing the appearance of the slabs. It is particularly useful on textured or porous concrete flags. Reapply every two to three years or when water stops beading on the surface.
Sweep the patio regularly to prevent leaf and organic debris building up in the joints — it encourages moss and weed growth. Periodically check the fall has not shifted and repoint any joints where mortar has cracked out.
Raised Beds
Treated timber will last many years without intervention, but exposed cut ends are more vulnerable. Apply a brush-on timber preservative to any ends you cut on site. If you have used decking boards or untreated timber as a design choice, consider Cuprinol Anti-Slip Decking Stain on the outer faces — it penetrates the timber and provides weather resistance with a clean finish.
Refill raised beds with a mix of good-quality topsoil and compost each season as the growing medium compresses and depletes. Top up rather than fully replace — the existing soil structure and biology beneath is worth preserving.
Summary
Both a raised bed and a patio are satisfying projects that deliver tangible improvements to a garden. The principles overlap more than they differ: accurate setting out, solid ground preparation, appropriate materials for the application, and the right fixings throughout. Take time at the planning stage, use quality materials, and the finished result will require minimal maintenance and serve the garden well for many years.